Installing Drum Brakes
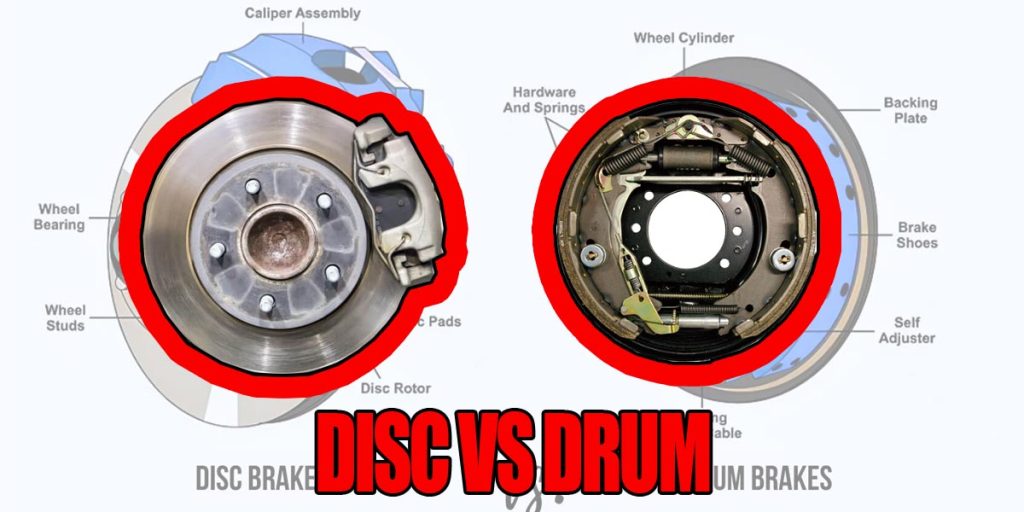
Is it time to rebuild your drum brakes? If you’re building your classic on a budget, or want it exactly as it rolled off the assembly line, rebuilding the drum brakes is a great option. Another drum brake situation is if you swap to disc brakes in the front but want to save a penny you can easily use the factory drum brakes in the rear.
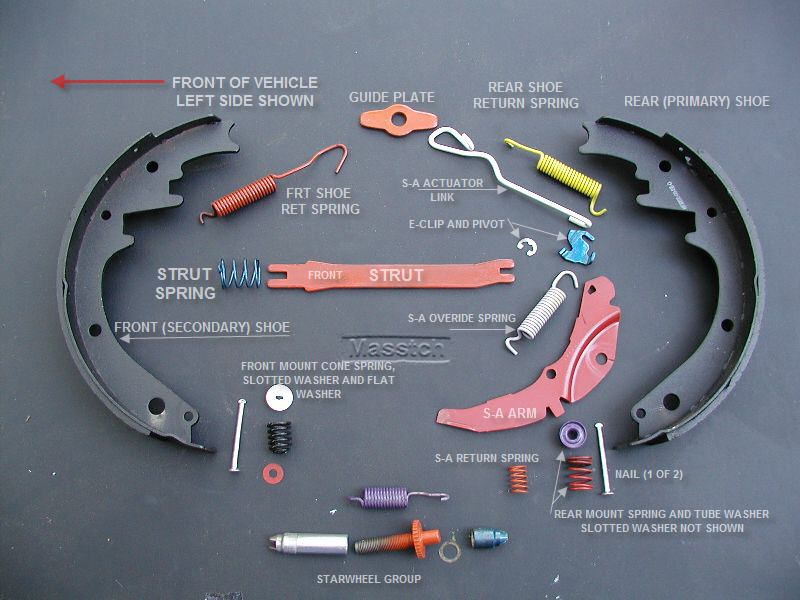
Drum brakes are pretty basic in theory, but they do have a few springs and wires that have to be installed perfectly for them to work properly. In essence, there are two brake shoes that push outward and rub against the inside of the brake drum to slow them down. They work great but can pull to one side and succumb to heat sink rather fast.
Rebuilding the drum brakes is a great way to make sure that they are working properly and will slow you down when you need them. The first step will be to secure the car up on jack stands and remove the wheel along with the drum itself.
Now before you go further and start ripping off all the old springs and shoes, we have a major tip for you. Take apart and rebuild only one side right now. Don’t take apart both sides. If you take apart only one side, you’ll have one other side that you can reference. Don’t think that you’ll remember where the springs always go because it’s pretty easy to forget. Having a completed side to look at will save you hours of time.
Safety First!
When tearing down the brakes, it’s important to use safety. Wear gloves and safety glasses. These springs are under tension and can pop off and fly away easily. There’s no exact method to remove all the old pieces; You’ll need to pop the springs off and for the ones that come out straight at you, you have to push down the retainers and twist them in order for them to pop off.
After you have everything off, time to inspect. If you need to replace axle seals now is a great time to do it. If your wheel cylinders are leaking or need to be replaced, now is the time to do that as well. Replacing the wheel cylinder is two small bolts and the brake line but will require you to bleed the brakes.
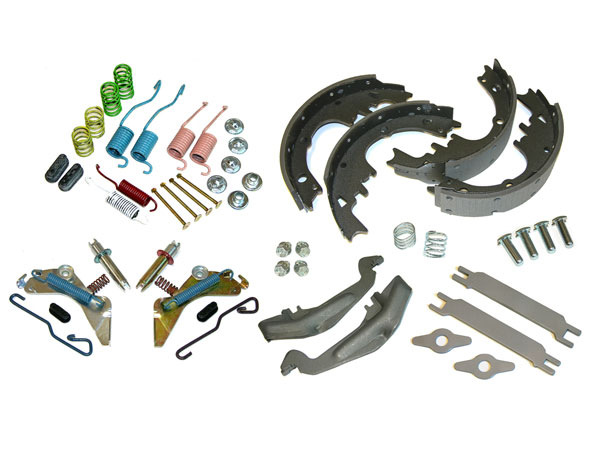
You can reuse the springs and pieces in the drum brake system, but we prefer to start with fresh pieces. We offer this kit, which is everything minus backing plates, wheel cylinders, and the drum itself. But if you’re rebuilding the rear drums this is a great kit to make sure you have everything and pieces in working order.
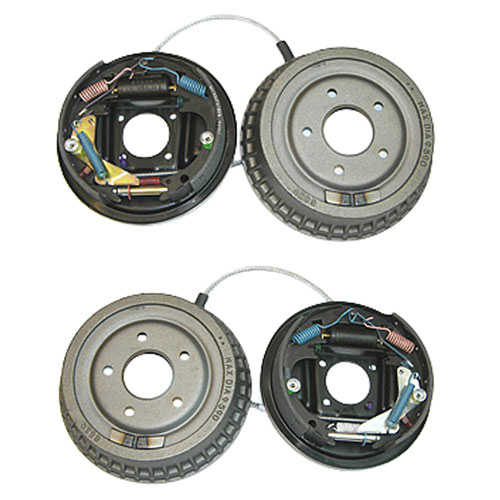
We also offer complete kits with backing plates, wheel cylinders, and drums ready to bolt on.
Now’s the time to start reassembly. The first thing you’ll want to make sure you have is the right brake shoes. The shoe with more material and longer goes towards the rear while the shorter shoe goes towards the front. What we like to do is hold one brake shoe in place, and the small posts that go through the shoe and get the spring, install those springs. These are the ones with the caps and go about the middle of the brake shoe.
With both shoes being held in by these horizontal springs, you can still move the shoe around but it’s not locked into place. From here we align the tops of the shoes into the wheel cylinders, then slide the adjuster into the bottom. At this point, there’s not necessarily a correct order of operations, but you have to make sure to install each spring and arm exactly the same way it came off. Again remember to reference the other side.
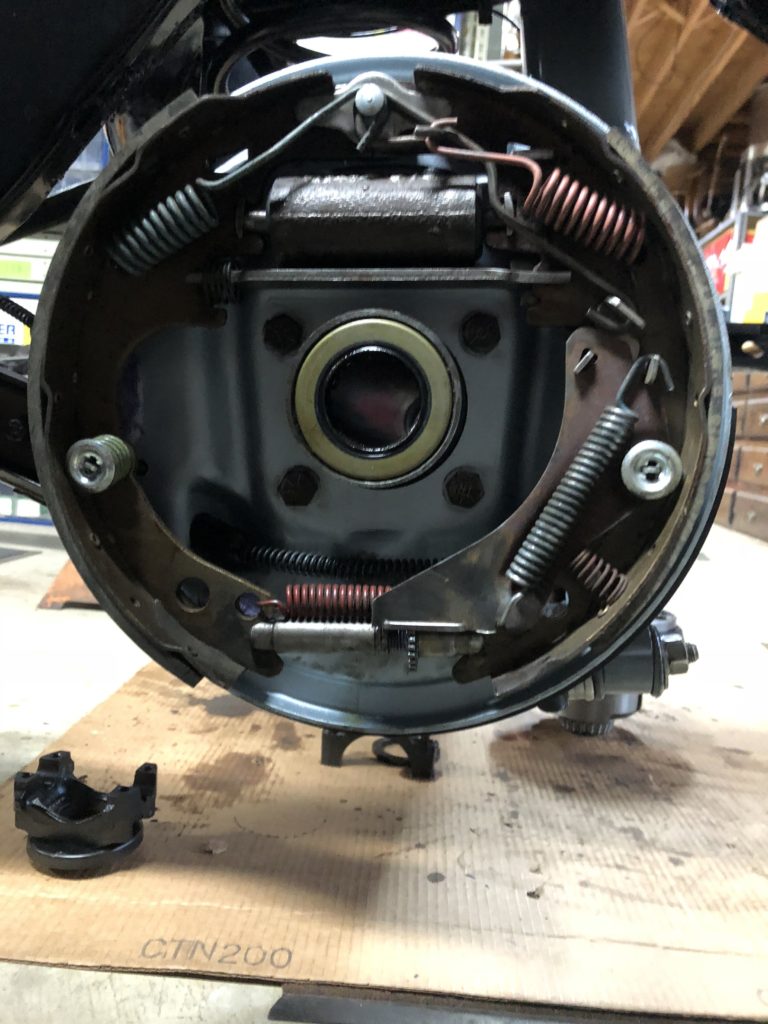
The best way to see how to install all these is with the YouTube video above that shows the entire process step-by-step. However here are some completed drum brake pictures that you can use for reference as well.
Once you have all the pieces and springs back together, it’s important to properly adjust the drum brakes. What you’re adjusting is the distance between the shoes and the drum. If it’s too tight you won’t be able to get the drum on or they will drag. Too loose and your pedal will travel too far. To adjust start by rotating the adjuster at the bottom out until you can just slide the drum over the new shoes. Then through the slot in the drum, you can continue to adjust. Remember you want it just right; not too tight or too loose.
If you get stuck, need some help, lost a spring, or anything else, give our friendly techs a call at (203) 235-1200 and they will be happy to help!

